 blog
blog
Is Retro Console Capacitor Replacement Worth It?
Table of Contents
- What Capacitor Replacement Means for Retro Consoles
- Signs of Bad Capacitors in Game Consoles
- Console Capacitor Lifespan: How Long Do They Last?
- Retro Console Capacitor Replacement Cost: Parts, Labor, and Value
- How to Replace Capacitors in a Game Console
- Model-by-Model Guide: Which Consoles Actually Need Recapping?
- Recapping vs. Targeted Repair: When to Fix Only What's Broken
- Risks of Unnecessary Recapping and How to Diagnose First
- Frequently Asked Questions
Last Updated: October 13, 2026
What Capacitor Replacement Means for Retro Consoles
Capacitor replacement is desoldering old capacitors from a console's board and installing new ones.
Whether it's worth it depends on the console, the symptoms, and how the hardware was stored. This guide from Retroaholics walks through that decision.
Capacitors smooth voltage so chips get steady power. When they drift out of spec, the console acts strange before it stops working entirely.
How Capacitors Age and Fail
Electrolytic capacitors contain a liquid electrolyte that dries out over time, and heat speeds the process. A console that ran hot ages faster than one that sat in a closet.
Three failure modes matter most:
- Dried out: The capacitor loses capacitance and stops smoothing voltage.
- Leaky: Fluid escapes and corrodes the board around it.
- Shorted: The capacitor fails completely and can take other components with it.
Leaky capacitors are the dangerous ones: their corrosion eats through traces and pads, turning a simple swap into serious board repair.
Signs of Bad Capacitors in Game Consoles
The classic signs of bad capacitors are visual glitches, audio problems, and power issues that worsen as the console warms up. Watch for these:
- Screen flicker or a dim, washed-out display
- A wavy image that drifts or rolls
- Unstable video that clears up after a few minutes
That last one is the tell: a console that works cold and fails after twenty minutes has a heat-related capacitor problem.
Not every glitch points to capacitors, though, a dirty cartridge slot, bad power supply, or worn cable causes the same flicker. That's why testing comes before replacing.
Console Capacitor Lifespan: How Long Do They Last?
Most electrolytic capacitors in game consoles are rated for roughly 1,000 to 2,000 hours at maximum rated temperature. Run them cooler and they last far longer; run them hot and they age fast.
That rating doesn't mean a console dies at 2,000 hours, it means performance starts to drift. Many 1980s and 1990s consoles still run on original capacitors.
Storage Conditions and Unused Consoles
Unused consoles are not safe consoles. Heat, humidity, and temperature swings push capacitors toward failure, and a garage or attic delivers all three.
Storage that helps:
- Cool, stable room temperature
- Low humidity
- Out of direct sunlight
Storage that hurts:
- Damp basements
- Hot attics and garages
- Repeated freeze-thaw cycles
A console stored well for thirty years may need nothing. One stored in a humid basement may already show corrosion.
Retro Console Capacitor Replacement Cost: Parts, Labor, and Value
Retro console capacitor replacement cost splits into four buckets: parts, tools, labor, and risk. Parts are cheap; labor is where the money goes, so the decision is really about your time and skill.
Our framework: add up what the console is worth to you, then compare it to the total cost of the job. If the job costs more than the console would sell for, you're paying for sentiment, not resale, legitimate, as long as you're honest about the math.
Parts: The Cheap Part
A capacitor kit for a single console typically runs in the low tens of dollars, and individual electrolytic capacitors cost cents to a couple of dollars each depending on capacitance, voltage rating, and source. A cartridge-based recap might involve a dozen capacitors; a CD-based system with a power board and a main board can involve forty or more.
Tools: One-Time Cost, Long-Term Payoff
If you're doing the work yourself, the tool list is the real entry fee:
- Temperature-controlled soldering iron: the single most important purchase
- Desoldering pump or wick
- Flux and isopropyl alcohol for cleanup
A basic setup runs well under a hundred dollars; one that handles surface-mount work runs several times that. Tools don't expire, so the per-job cost drops fast if you recap more than one console.
Labor: Where the Money Actually Goes
Professional recap pricing depends on the console, board revision, capacitor count, and the shop's bench rate. A four-cap job and a forty-cap job are not the same work, and no honest shop quotes a blanket number. Expect to provide your exact model and board revision, and expect the quote to reflect capacitor count and whether leaked electrolyte needs cleaning.
A common pattern: labor exceeds resale value for common models and falls below it for rare or high-demand ones.
Risk: The Cost Nobody Quotes Up Front
Every desoldering pass carries a chance of lifting a pad or pulling a trace, on a board with forty capacitors, that's forty chances. A lifted pad on a single-layer board is minor; on a multi-layer board with an inner trace, it can be unrepairable without a donor board. If the console is valuable and you're not confident, that risk is real even though it never shows up on an invoice.
The Value Question
A recapped console is more reliable, but a recap doesn't raise resale value the way a rare game or boxed console does. Buyers treat it as maintenance, not a premium feature.
Run the numbers honestly: parts plus tools plus your time (or a shop's labor) plus the risk of damage, weighed against what the console is worth to you and what replacement would cost.
How to Replace Capacitors in a Game Console
Replacing capacitors in a game console means identifying each capacitor, matching its capacitance and voltage rating, desoldering the old part, and soldering in the new one with correct polarity.
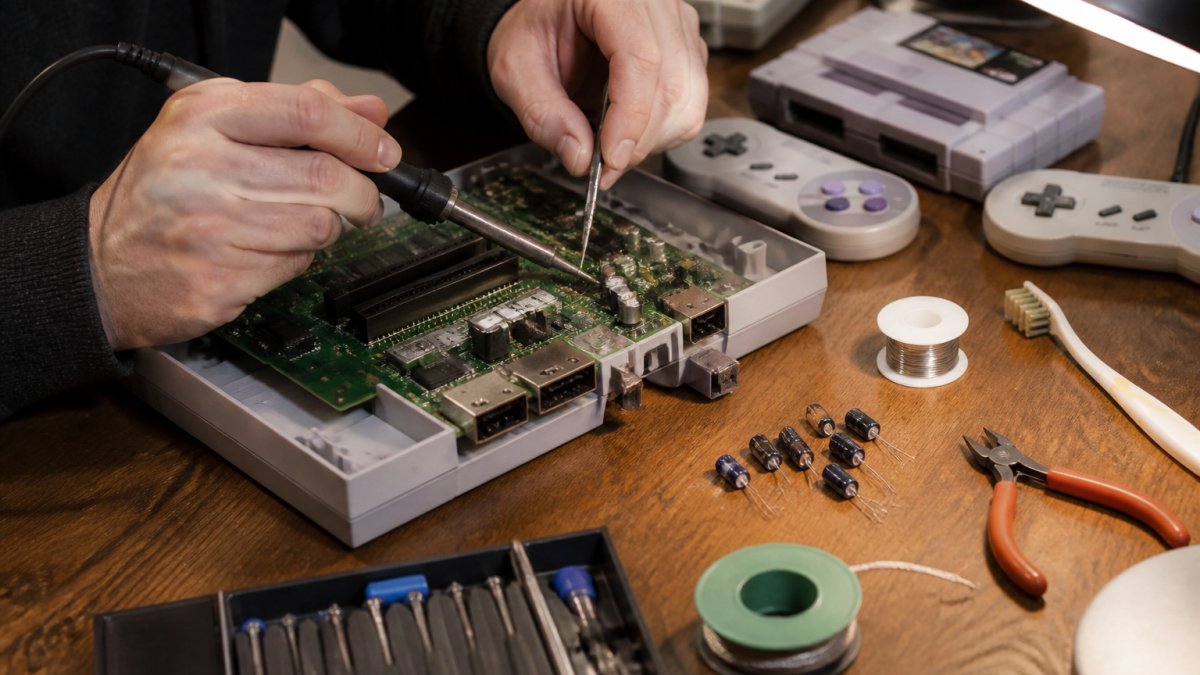
Total Time: 1 to 3 hours for a first-timer on a simple board Difficulty: Intermediate
Here's the process:
- Unplug and discharge. Let the console sit, then discharge the power supply before touching anything.
- Open the shell. Keep screws organized by location.
- Inspect the board. Look for bulging tops, residue, or corrosion before you touch an iron.
- Note every value. Write down capacitance and voltage for each cap. Match or exceed the voltage rating.
- Check polarity. Electrolytic capacitors have a marked negative stripe. Reversing one can pop it.
- Desolder the old cap. Add fresh solder first, then use wick or a pump to clear the joint.
- Clean the pads. Remove old solder and any leaked fluid.
- Fit the new cap. Match polarity and seat it flush.
- Solder and trim. A clean joint should look shiny, not dull or blobby.
- Test before closing. Power on and check the symptoms are gone.
Expected Result: Stable video, clean audio, and no random resets.
DIY vs. Professional Repair: Skill and Safety Thresholds
DIY makes sense if you've soldered before and the board is simple. Professional repair makes sense if you haven't, or if the board is dense and valuable.
The threshold is board damage: lifted pads and burned traces turn a cheap job into an expensive one. If you've never desoldered a through-hole component, practice on a junk board first.
Model-by-Model Guide: Which Consoles Actually Need Recapping?
Most retro consoles do not need a full recap. A handful of families are known for capacitor problems; the rest usually need targeted repair. Treating every console as equally prone to failure is how people end up replacing forty good capacitors to fix one bad one.
Here's how the major families sort out in practice, a pattern, not a rule, since board revisions vary and storage history matters as much as the model.
Higher-Risk Families
Early CD-based systems. Optical drive consoles from the early to mid-1990s run hot, draw significant power, and pack capacitors close together near the power supply and disc drive.
Handhelds with audio or power faults. Certain handhelds develop sound or power issues traced to one or two specific capacitors rather than a board-wide problem, targeted-repair candidates, not full-recap candidates.
Systems with known leaking-capacitor eras. Some production runs used batches that leaked earlier than expected.
Lower-Risk Families
Cartridge-based home consoles. Fewer capacitors, less heat, simpler power circuits.
Late-model revisions. Later board revisions often used better-rated components and improved thermal design. Newer isn't automatically safe, but failure rates are generally lower than early production runs.
Well-stored units. A console kept cool, dry, and out of sunlight may outlast a poorly stored unit by decades regardless of model.
How to Sort Your Specific Console
- Identify the exact model and board revision. The revision number matters more than the model name. Two consoles with the same name can have different boards and capacitor populations.
- Check the community knowledge base for that revision. Documented leak patterns and known-bad batches exist for many popular models. If your revision isn't documented, you're in diagnostic territory, not preventive territory.
- Inspect the board before ordering parts. Look for bulging tops, residue, or corrosion. A clean board on a low-risk model is a strong signal to leave it alone.
- Test if you can. Capacitance and ESR measurements tell you more than a visual inspection. If you can't test, don't assume.
- Match the repair to the finding. One bad capacitor means one replacement. Widespread out-of-spec readings mean a full recap is reasonable.
The honest summary: a small number of console families and specific board revisions are genuinely recap-prone, and the rest are not. If your console isn't on a known-problem list and isn't showing symptoms, the burden of proof is on the evidence, not the model line's reputation.
Recapping vs. Targeted Repair: When to Fix Only What's Broken
Targeted repair means replacing only the capacitors that test bad; a full recap means replacing every electrolytic capacitor on the board whether it's failing or not.
Targeted repair wins when the console has one clear symptom and one suspect area, it's cheaper, faster, and lower risk because you touch less of the board.
The trade-off: a full recap costs more and carries more risk of board damage, but it resets the clock on every capacitor at once.
Risks of Unnecessary Recapping and How to Diagnose First
Unnecessary recapping is the most common waste of money in retro console repair.
Diagnose before you desolder:
- Visual inspection first. Look for bulging, cracking, or residue.
- Test with a multimeter. Check capacitance and ESR where you can.
- Check the cheap stuff first. Cables, power supplies, and dirty slots cause most "capacitor" symptoms.
If the symptoms point to one area and testing confirms one bad cap, replace that one.
For general guidance on safe electronics work, the Occupational Safety and Health Administration publishes workplace safety standards that translate well to a home bench. And for understanding how component aging affects electronics, NASA's technical standards on electronic parts offers detailed reference material. If you're weighing whether a repair is worth it versus replacing the hardware, Federal Trade Commission consumer guidance has plain-language advice on making informed buying decisions.
The real question isn't whether recapping works. It's whether your specific console needs it, and whether you're the right person to do it.
If you'd rather not risk a board you love, Retroaholics can help.
Frequently Asked Questions
How do I know if my retro console needs new capacitors?
Look for visual signs like bulging, leaking, or corroded capacitors on the motherboard. Performance symptoms include screen flicker, dim display, wavy image, unstable video, quiet or crackly audio, and missing sound. If your console shows these signs and a visual inspection confirms capacitor damage, replacement is likely needed. Testing with a multimeter can confirm capacitance and ESR values, but if you're unsure, a professional repair shop can diagnose it accurately.
How much does it cost to recap a retro console?
Retro console capacitor replacement cost varies by model and whether you do it yourself or hire a pro. DIY capacitor kits require parts and tools if you don't own them. Professional recapping services vary depending on complexity and labor. For rare or valuable consoles, professional service may be worth the investment to avoid board damage.
Can leaking capacitors damage a retro game console?
Yes, leaking capacitors can cause serious damage. The electrolyte fluid is corrosive and can eat through circuit board traces, damage nearby components, and cause shorts. If left unchecked, it may lead to permanent motherboard damage that's expensive or impossible to repair. If you spot leakage, clean the area with isopropyl alcohol and replace the capacitors promptly. Early intervention prevents minor issues from becoming terminal.
Is it safe to replace console capacitors yourself?
It can be safe if you have basic soldering skills and follow proper safety procedures. Always unplug the console and discharge capacitors before working. Use a temperature-controlled soldering iron, desoldering pump or wick, and work in a well-ventilated area. Risks include lifted pads, board damage, and installing capacitors with incorrect polarity. If you're new to soldering, practice on a scrap board first. For valuable consoles, consider professional repair.