 how-to
How to Check Retro Game Save Batteries
Table of Contents
- Why Save Batteries Fail and What It Means for Your Collection
- Tools Needed for Retro Game Maintenance and Safe Testing
- How to Check a Retro Game Save Battery: Step-by-Step
- Retro Game Cartridge Battery Life Expectancy by Platform
- How to Replace a Game Boy Save Battery (and Other Cartridges)
- Backing Up Saves Before the Battery Dies
- Frequently Asked Questions
Last Updated: October 9, 2026
Why Save Batteries Fail and What It Means for Your Collection
A dead save battery doesn't just lose your progress, it can erase decades of memories in a single power cycle.
A save battery is a small coin cell inside a game cartridge that keeps save data alive when the console is off. When that cell dies, the game forgets everything.
Most cartridges from the 1980s and 1990s rely on these cells. They were never meant to last forever.
How Cartridge Save Batteries Work
A battery-backed save uses a tiny lithium cell to power a memory chip that holds your save file while the console is off.
Two chip types show up most often:
- SRAM stores the save data directly
- Real-time clock chips track time for games with day/night cycles
The battery feeds both. Pull the power, and the save vanishes within seconds to hours.
Signs a Save Battery Is Failing
The warning signs usually show up before total failure:
- Your save file disappears after the console sits off for a while
- The game saves sometimes but not always
- You see a "save data corrupted" message
- A game with a clock resets its date and time
Intermittent saving is the biggest tell: a weak battery holds a charge for short sessions, then drops below the threshold overnight.
Tools Needed for Retro Game Maintenance and Safe Testing
You don't need a full repair bench to check a cartridge battery. A few basic tools cover most jobs.
Here's what to keep on hand for retro game maintenance:
- A digital multimeter for voltage readings
- A precision screwdriver set with the right game bit
- A game bit or security bit for Nintendo cartridges
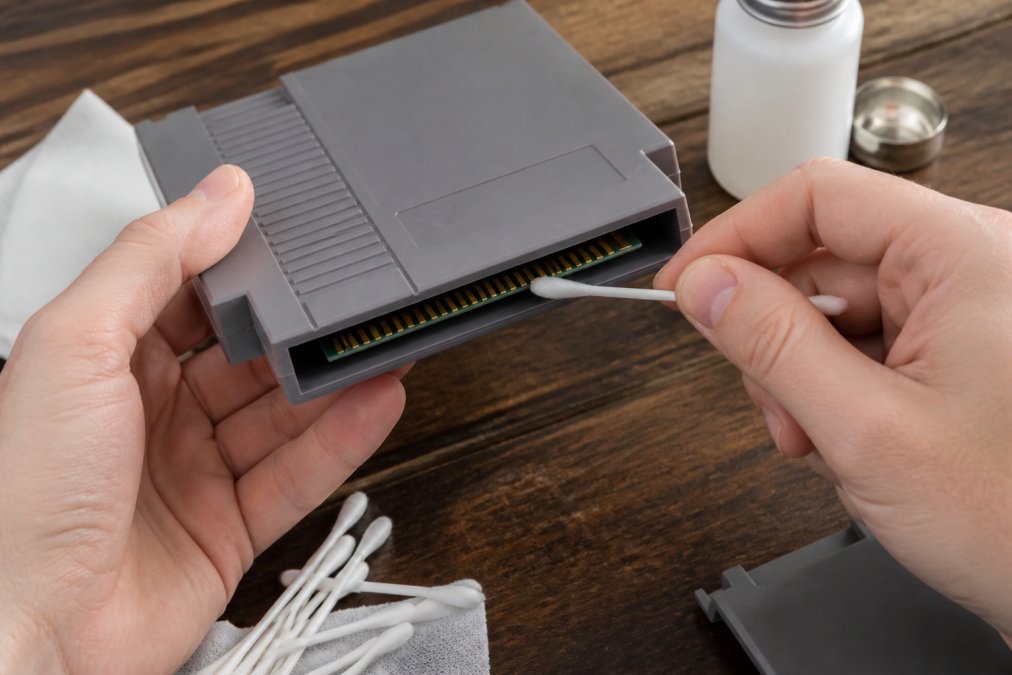
- Isopropyl alcohol and cotton swabs for contacts
- A clean, static-free work surface
A multimeter is the one tool you can't skip. It tells you the actual battery voltage instead of guessing.
For the Multimeter basics guide from Fluke, start with the DC voltage setting. That's the mode you'll use on every cartridge cell.
Some collectors also use a dedicated battery tester. It's faster, but a multimeter gives you a real number to read.
How to Check a Retro Game Save Battery: Step-by-Step
Total Time: 10-15 minutes Difficulty: Beginner to intermediate
What You'll Need:
- Digital multimeter with a DC voltage setting
- Precision screwdriver set and the correct game bit for the cartridge
- Isopropyl alcohol (90% or higher) and swabs
- Clean, static-free work surface
Step 1: Power off and remove the game. Never test a cartridge while the console is powered on.
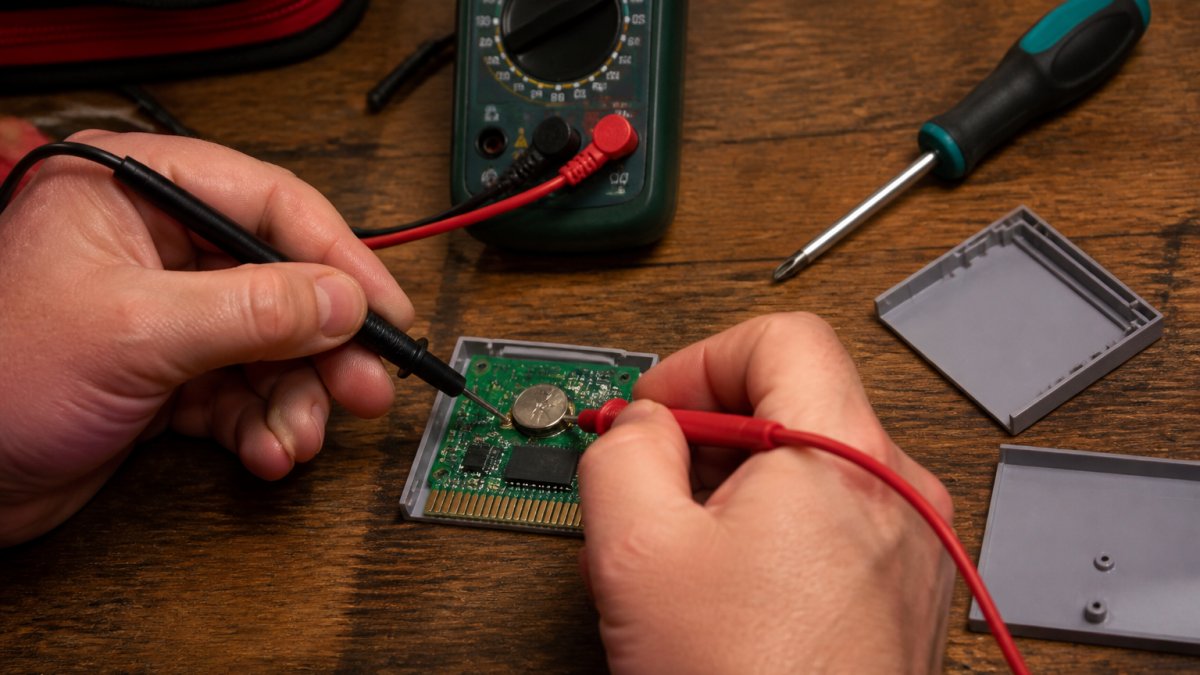
Step 3: Locate the battery and identify the contact points. The battery is the silver coin cell, usually held by a soldered metal tab.
Step 5: Touch the probes to the battery terminals. Red on positive, black on negative.
Step 6: Read the number and record it. A fresh CR2032, CR1616, or CR2025 reads close to 3.0V. Write it down so you can compare later.
Step 7: Test under load. This is the step most guides skip.
Testing Without Opening the Cartridge
You can get a rough read without opening anything, and for many collectors this is the right first step. Play, save, then leave the console off for 24 to 48 hours.
A second non-invasive check: save, power off, remove the cartridge, and let it sit at room temperature for a day before reinserting. If the save survives, the battery holds at least some charge; if not, it's the first suspect.
This method can't give you a voltage number, only pass or fail. For a real measurement you have to open the shell, but it's a safe way to decide whether opening the cartridge is worth the risk.
Reading Voltage and Interpreting Results
Voltage tells you how much life is left, but a single resting reading is not the whole story. Here is how we read the numbers:
| Voltage Reading | What It Means | Action |
|---|---|---|
| 3.0V or higher | Healthy cell | No action needed |
| 2.7V to 3.0V | Aging, still working | Back up saves soon |
| Below 2.7V | Weak or failing | Replace now |
| Near 0V | Dead | Replace and expect data loss |
A reading that drops fast under load is a bad sign even if it starts high. Test twice: if the readings differ by more than about 0.1V, the cell is unstable and should be replaced.
Voltage alone doesn't guarantee reliable saving. A cell can read 2.9V at rest and still fail under the current draw of a real-time clock chip, which is why the load test in Step 7 matters, and why a game that saves fine today can lose its save tomorrow.
Retro Game Cartridge Battery Life Expectancy by Platform
Most coin cells last 15 to 25 years, but exact lifespan depends on the platform, the chip inside, and storage. Games with a real-time clock drain faster because the clock runs constantly, even when the console is off.
| Platform | Common Cell | Typical Life | Notes |
|---|---|---|---|
| Game Boy / Game Boy Color | CR1616 or CR2025 | 15-25 years | CR2025 holds more capacity than CR1616 |
| Game Boy Advance | CR1616 | 15-20 years | Some later carts use flash memory and no battery |
| NES | CR2032 | 20-30 years | SRAM only, no clock |
| SNES | CR2032 | 20-30 years | Some carts use SRAM, some use flash |
| N64 | CR2032 | 15-20 years | Controller Pak also uses a CR2032 |
Two things shorten battery life:
- Games with a real-time clock, which draw power nonstop
- Cartridges stored in hot or humid places
Why Lifespan Varies by Chip, Not Just by Cell
The cell is only half the story, the chip it powers determines how much current the battery supplies. An SRAM chip draws very little current when the console is off, so a CR2032 in an NES cartridge can last 20 to 30 years.
Flash memory cartridges are a separate case. Many later Game Boy Advance and some SNES titles use flash memory instead of SRAM and have no save battery at all. If you open a cartridge and don't see a coin cell, it may be a flash cart, don't assume every retro cartridge has a battery.
Estimating Remaining Life From a Voltage Reading
You can use the voltage reading to estimate remaining life, but the relationship isn't linear. A lithium coin cell holds most of its voltage for most of its life, then drops quickly near the end. A reading of 2.9V doesn't mean 90% life remaining, it means the cell is in the flat part of its discharge curve and could last years or fail soon depending on load.
A practical rule: if the reading is 3.0V or higher, the cell is likely in good shape. If it is between 2.7V and 3.0V, treat it as aging and back up saves soon. If it is below 2.7V, replace it. If it is near 0V, the save is likely already gone.
Platform-Specific Testing Notes
Battery type, circuit design, and symptoms vary by system, so don't treat all retro cartridges alike.
- Game Boy and Game Boy Color: The battery is usually a CR1616 or CR2025 soldered to the board. The save chip is SRAM, so a dead battery means a lost save. Test at the battery tabs, not the cell casing.
- Game Boy Advance: Many carts use a CR1616. Some later carts use flash memory and have no battery. Check for a coin cell before assuming you need to test one.
- NES and SNES: Most carts use a CR2032 in a soldered tab. SRAM holds the save. A dead battery means the save is gone, but the game will still boot.
- N64: The cartridge battery is a CR2032, and the Controller Pak also uses a CR2032 for save data. If your Controller Pak loses saves, test that battery separately from the cartridge.
If you are unsure of a game's age, assume the battery is near the end. A cheap test beats a lost save.
How to Replace a Game Boy Save Battery (and Other Cartridges)
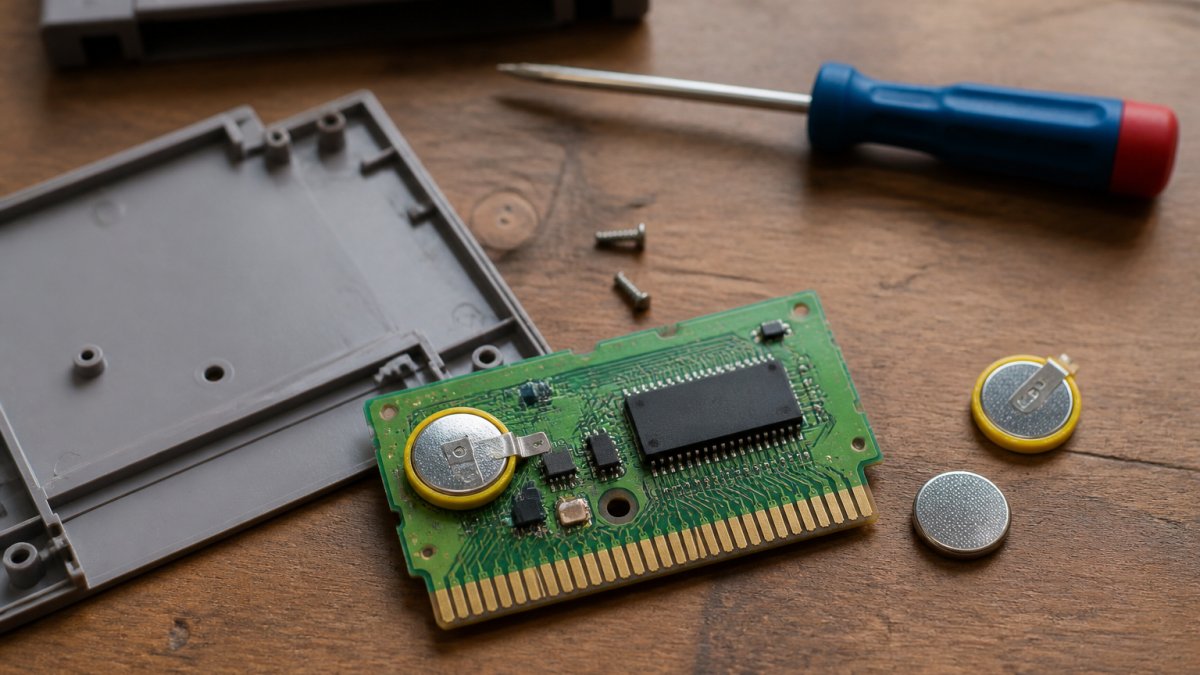
Replacing a cell is a soldering job on most cartridges. The battery sits in a metal tab that's soldered to the board.
Here's the process to follow:
- Open the shell and note the battery orientation
- Desolder the old battery tab from the board
- Slide in a fresh cell with a new tab
- Solder the tab to the board
- Check polarity before closing up
- Test the voltage and confirm the game saves
Battery polarity matters. Flip the cell and you can damage the board. Match the positive and negative marks to the original layout.
If soldering isn't your thing, don't force it, a bad solder joint can kill the cartridge. Ask a shop that handles retro repairs.
A word on safety: lithium coin cells are safe when handled correctly, but never puncture or crush one. The EPA guidance on battery handling covers safe disposal once a cell is spent.
Backing Up Saves Before the Battery Dies
Backing up saves is the smartest move before any battery work. It protects your progress no matter what happens during the repair.
Your options:
- Cartridge dumpers that read the save data to a computer
- Retro console backup devices that copy saves from the console
- Emulator save files if you already play on a computer
Dump the save first, then test or replace the battery. If something goes wrong, you still have the file.
For collectors rebuilding a childhood library, this step matters most. A save you can't recover is gone for good.
At Retroaholics, every cartridge we sell is tested, so you know the battery and save are in working shape before it reaches your shelf. Our trade-in program is a good way to move a collection you no longer play, and our community events keep local collectors connected.
Frequently Asked Questions
Do all retro game cartridges use save batteries?
No. Battery-backed saves appear in many NES, SNES, Game Boy, Game Boy Color, and Game Boy Advance titles, but plenty of cartridges use other methods. Some later games rely on EEPROM or flash memory, and a few use FRAM chips that don't need a battery at all. If you're unsure whether your cartridge has a battery, check the board or look up the specific title. Games without a battery can still lose saves, but the cause is usually a corrupted chip rather than a dead battery.
Can I check a save battery without opening the cartridge?
You can get clues without opening the shell. If a game that previously held saves suddenly boots to a blank file, or if the title uses a real-time clock and the in-game time resets, the battery is likely dead or dying. However, these signs only confirm failure after the fact. To measure actual voltage, you need to open the cartridge and touch a multimeter to the battery. Non-invasive testing tells you something is wrong; it can't tell you how much life is left.
What voltage reading means the battery is still good?
A fresh CR1616 or CR2025 coin cell reads around 3.0 to 3.2 volts. If your multimeter shows under 2.0 volts, treat the battery as dead.
How long do original game save batteries typically last?
Most original coin cell batteries in retro cartridges were rated for roughly 15 to 25 years of active use. Many Game Boy and SNES games from the late 1980s and 1990s are now past that window, which is why so many lose saves. Battery life depends on how often the game was played, how long it sat unused, and storage conditions. Heat and humidity shorten lifespan. If you have a cartridge that has never had its battery replaced, assume it's on borrowed time.
Save batteries are the quiet clock ticking inside every classic cartridge. Test them early, back up your data, and replace weak cells before they fail. Retroaholics tests every game and console we sell, offers a trade-in program for collections, and hosts live community events for collectors who want a real place to belong. Shop with Retroaholics and rediscover your favorites with confidence.